Showing posts with label Hook. Show all posts

Friday, January 25, 2013

Free Pattern: Blooregard Q. Kazoo (aka Bloo)

My daughter's been watching a lot of Foster's Home for Imaginary Friends lately, can you tell? Bloo seemed the easiest imaginary friend to create, so here he is! My Bloo is 3.5 inches in height.

Pattern and photos are Copyright © 2013 Lillian Minneman - Just Stitched. Pattern shall remain free, and may not be reproduced or sold. Feel free to link to this pattern. Blooregard Q. Kazoo and Foster's Home For Imaginary Friends are copyright their respective owners. No copyright infringement intended.

Bloo is made in the continuous round. Please read the pattern in full before beginning. Feel free to contact me for any questions you may have.

Materials:
G/4.25mm Hook
WW yarn in blue
WW yarn in white
WW yarn in black OR Black Embroidery Thread
Scissors
Yarn Needle
Polyfil or filling material
(Optional: Beads or beans)

Eyes Make 2 in White.
Round 1: 4sc in Magic Circle(4)
Round 2: 2sc in each st around (8)
Slst in first sc, ch1 and F/O, leaving tail for sewing.
Prepare eyes by placing the safety eyes through whites in desired location. I chose to offset them from the center.

Body in Blue.
Round 1: 6sc in Magic Circle
Round 2: 2sc in each st around (12)
Round 3: *sc in next st, 2sc in next st* around (18)
Round 4: *sc in next 2st, 2sc in next st* around (24)
Round 5: *sc in next 3st, 2sc in next st* around (30)
Round 6-19: sc around (30)
Add more rounds if you want a taller Bloo.
Round 20: In BLO, sc around (30)
Round 21: *sc2tog, sc in next st* around (20)
Place prepared eyes' safety eye through the space between rounds 8&9 and 4-6 st apart, depending on where you placed the safety eye. Sew on using tail.
Round 22: *sc2tog* around (10)
Stuff, adding beads or beans for a little heft, if desired.
Round 23: *sc2tog* around (5)
F/O, closing hole. Weave in ends.

Arms Make 2 in Blue.
Round 1: 6sc in Magic Circle
Round 2: *sc in next st, 2sc in next st* around (9)
Round 3-5: sc around (9)
Round 6: *sc2tog, sc in next st* around (6)
Round 7: sc around (6)
F/O, leaving tail for sewing. Attach top to round 11 of the body.

Find me at:
http://www.facebook.com/pages/Just-Stitched/308561265852550
http://www.ravelry.com/people/LilyPants
http://juststitched.tumblr.com
http://juststitched.blogspot.com

Thursday, November 29, 2012

Free Pattern: Naruto Sleeping Cap (Versatile Stocking Cap)

The Holidays are here, and I'm frantically working up Christmas presents. I thought I started early, but my list keeps getting longer and longer. I was thinking about making another Santa-esque hat, but I couldn't find a pattern I REALLY liked. Then, while browsing hat patterns, I saw a variation someone did of that hat, only it was Naruto's Sleeping Hat. I, myself, have never seen Naruto, but I know two of my brothers have watched it, and one of them once mentioned this hat to me. I looked it up (whenever that was), but got busy and forgot about it. Until now!

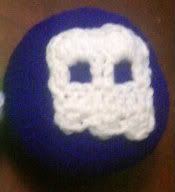
This hat is made in the continuous round. Please read the pattern in full before beginning. Feel free to contact me for any questions. It can be made with round eyes, or squinty eyes (not pictured). Pattern for each is included.

More photos below. Pattern and photos are Copyright © 2012 Lillian Minneman - Just Stitched. Pattern shall remain free, and may not be reproduced or sold. Naruto is copyright Masashi Kishimoto/Hayato Date/Shueisha/Studio Pierrot/TV Tokyo/Viz Media. No copyright infringement intended.


Materials:
J/6.00mm Hook
WW yarn in black
WW yarn in white
Small amount of polyfil or stuffing
Stitch Marker (strongly recommended)
Yarn Needle
Scissors

Key:
CH - Chain
HDC - Half Double Crochet
SC - Single Crochet
SLST - Slip Stitch
ST - Stitch
SC2tog - Decrease
MR - Magic Ring/Magic Circle
F/O - finish off HDC2tog - Half Double Crochet Decrease (Yarn Over, insert hook into stitch. Yarn Over, pull up loop. Yarn over, insert hook into next stitch. Yarn over, pull up loop. Yarn over, pull through all loops on hook.

Hat: Beginning in white
Ch65, join (be careful not to twist!)
Rounds 1-4: HDC around (65) Switch to black at the end of round 4. (I highly recommend using a stitch marker to mark the end of each round as you go, because black is a difficult color to see!)
Rounds 5-14: HDC around (65)
Round 15: HDC2tog, HDC in next 3 (HDC2tog, HDC in next 8) around (58)
Round 16: HDC2tog, HDC in next 1 (HDC2tog, HDC in next 3) around (46)
Round 17-19: HDC around (46)
Round 20: HDC2tog, (HDC2tog, HDC in next 9) around (41)
Round 21-23: HDC around (41)
Round 24: HDC2tog, HDC in next 3, (HDC2tog, HDC in next 7) around (36)
Round 25-27: HDC around (36)
Round 28: (HDC2tog, HDC in next 4) around (30)
Round 29-31: HDC around (30)
Round 32: (HDC2tog, HDC in next 3) around (24)
Round 33-35: HDC around (24)
Round 36: (HDC2tog, HDC in next 2) around (18)
Round 37-39: HDC around (18)
Round 40: (HDC2tog, HDC in next) around (12)
Round 41-43: HDC around (12)
Round 44: (HDC2tog) around (6)
Round 45-47: HDC around (6)
F/O, leave tail for sewing

Ball: In white
Round 1: SC6 in MR (6)
Round 2: 2sc around (12)
Round 3: sc ar (12)
Round 4: sc2tog, 1sc (8)
Round 5: sc2tog around (4)
F/O, leave tail for sewing

Teeth: In white
Attach yarn in desired area of hat with a SLST.
Row 1: HDC in same stitch as SLST, and in next 4. CH1, turn.
Row 2: HDC across (5) F/O.
Attach Yarn in 12th st from first tooth with a SLST.
Repeat Rows 1 & 2 above. F/O. Weave in ends.

Nose: In black
Round 1: sc4 in MR (4)
Round 2: *2sc in next, sc in next* twice (6)
Round 3: 2sc around (12)
Round 4: Sc around (12)
F/O, leave tail for sewing.
Center between two teeth, and sew on half on the white and half on the black.

Round Eyes: (Make 2 in white)
Round 1: SC6 in MR (6)
Round 2: 2sc around (12)
Round 3: *2sc, 1sc* around (18)
F/O, weave in ends.

Round Eye Pupils: (Make 2 in Black)
SC5 in MR. Join with SLST.
F/O, leave tail for sewing.

Half Circle Eyes: (Make 2 in White)
Row 1: sc 3 in MR. When pulling tight, keep all stitches to one side.
Row 2: ch1, turn. 2sc across. (6)
Row 3: ch 1, turn. (Sc in st, 2sc in next) across (9)
Sc evenly across flat side, skipping the center of first row. (3)
SC in first stitch of Row 3. F/O.

Half Circle Eye Pupils: (Make 2 in Black.)
SC3 in MR. Join with SLST.
F/O, leave tail for sewing.


Find me at:
http://www.facebook.com/pages/Just-Stitched/308561265852550
http://www.ravelry.com/people/LilyPants
http://juststitched.tumblr.com
http://juststitched.blogspot.com

Wednesday, October 24, 2012

Free Pattern: Miniature Top Hat

A friend of mine and I have been bouncing ideas off each other, creating new patterns, and such, and I came up with this miniature top hat for an upcoming project! Something good about this is that it's really basic, but it's also easily customizable. You can make it bigger, taller, wider brim, add some tiny eyes and a little felt mustache....anything goes!


Pattern and photos are Copyright © 2012 Lillian Minneman - Just Stitched. Pattern shall remain free, and may not be reproduced or sold. Feel free to link to this pattern.

The Miniature Top Hat is made in the continuous round. Please read the pattern in full before beginning. Feel free to contact me for any questions.

Materials:
G/4.25mm Hook
WW yarn in black (or color of your choice)
Yarn Needle
Scissors

Miniature Top Hat
Round 1: sc6 in magic circle (6)
Round 2: 2sc in each st around (12)
Round 3: sc around in BLO (12)
Rounds 4-6: work in both loops, sc around (12)
Round 7: 2sc in FLO around (24)
Join to first sc of last round
F/O, weave in end.

Find me at:
http://www.facebook.com/pages/Just-Stitched/308561265852550
http://www.ravelry.com/people/LilyPants
http://juststitched.tumblr.com
http://juststitched.blogspot.com

Monday, October 22, 2012

Pattern Reading: Abbreviations List

This is a quick guide for pattern-reading. This will only tell you what each abbreviation stands for, not how to perform the instruction. Feel free to ask questions, though, I'd be more than happy to help!

I took the time to type out every abbreviation and description on my own. Please do not copy and paste this list anywhere, or claim it as your own. Feel free to link back.

Stitches:
For stitch abbreviations with instructions, see http://juststitched.blogspot.com/2012/02/stitch-cheat-sheet.html
ch - chain
slst - slip stitch
sc - single crochet
dc - double crochet
hdc - half double crochet
dtr - double triple crochet
fpdc - front post double crochet
bpdc - back post double crochet
c, cl - cluster
lp st - loop stitch
p - picot
pop or pc - popcorn stitch
rsc - reverse single crochet
tr - triple crochet
croc st - crocodile stitch

Materials:
WW - Worsted Weight
hk, hks - hook, hooks

Instructions:
[], (), ** - repeat instructions within
alt - alternate
beg - beginning
bet, btwn - between
blo - back loop only
CC - contrasting color
ch-sp - chain space
cont - continue
dec - decrease
inc - increase
f/o - finish off
flo - front loop only
foll - following
lp, lps - loop, loops
MC - main color
mm - move marker
R - row, or round
rem - remaining
rep - repeat
RS - right side
rnd - round
rev - reverse
pat - pattern
pm - place marker
sc2tog - single crochet 2 together
sk - skip
st - stitch
sp - space
tog - together
tch, t-ch - turning chain
ws - wrong side
yo - yarn over
yoh - yarn over hook

Find me at:
http://www.facebook.com/pages/Just-Stitched/308561265852550
http://www.ravelry.com/people/LilyPants
http://juststitched.tumblr.com
http://juststitched.blogspot.com

Monday, July 16, 2012

Free Pattern: Customizable Skull Applique (Updated April 15, 2013)

This is a great little applique to use if you're making Super Mario Mushrooms - it's perfect for the top of the purple mushroom! It's really versatile, so it's really easy to customize it to your liking!I paired mine with Linda Potts/Wolfdreamer's Mario Brother Mushrooms Pattern
This pattern was revised and updated.

Pattern and photos are Copyright © 2012 Lillian Minneman - Just Stitched. Pattern shall remain free, and may not be reproduced or sold. Feel free to link to this pattern.
Materials:
G/6/4.25mm Hook
WW Yarn in White

Row 1: Chain 10
Row 2: DC in 3rd ch from hook, DC in next, slst in next, *DC in next 2st, slst in next st* (9 st)
Row 3: Ch2, turn. Working across back side of beginning chs, DC across (8)
Row 4: Ch2, turn, DC in same st as ch2, ch2, skip 2 st, DC in next 2 st, Ch2, 2DC in last st. (5 DC)
Row 5: Ch2, turn, DC in next st, 4DC in chain space, DC in next 2, 4DC in chain space, Ch2, slst in last st.
F/O. leaving long tail for sewing. Weave in beginning end. Sew on.

Here's a few ways to customize:
In Row 2, add a picot between the DC's to make pointed teeth.
Add extra rows between Row 3 & 4.
In row 4, instead of DC (bolded text), SC or slst for slightly sinister-looking eyes.
Add extra rows after Row 5.

The possibilities are endless! Have fun!

If I forgot anything, or something doesn't make sense, please contact me!

Find me at:
http://www.facebook.com/pages/Just-Stitched/308561265852550
http://www.ravelry.com/designers/just-stitched
http://juststitched.tumblr.com
http://juststitched.blogspot.com